Characters are the heart of any story. Try to think of a story without a character — I honestly can’t remember any (and if you do, let me know in the comments).
The stories we read or watch stay with us because we relate to the characters or to what they’re going through. Maybe the character doesn’t look like us physically, but they share something familiar, like having a complicated relationship with a parent, as Pinocchio does. Or maybe we connect with them psychologically and recognize how their personality shapes their choices.
characters are crucial to storytelling.
That’s why it’s so important to consider who your character is when you create one.
Start with the essentials: research and moodboard
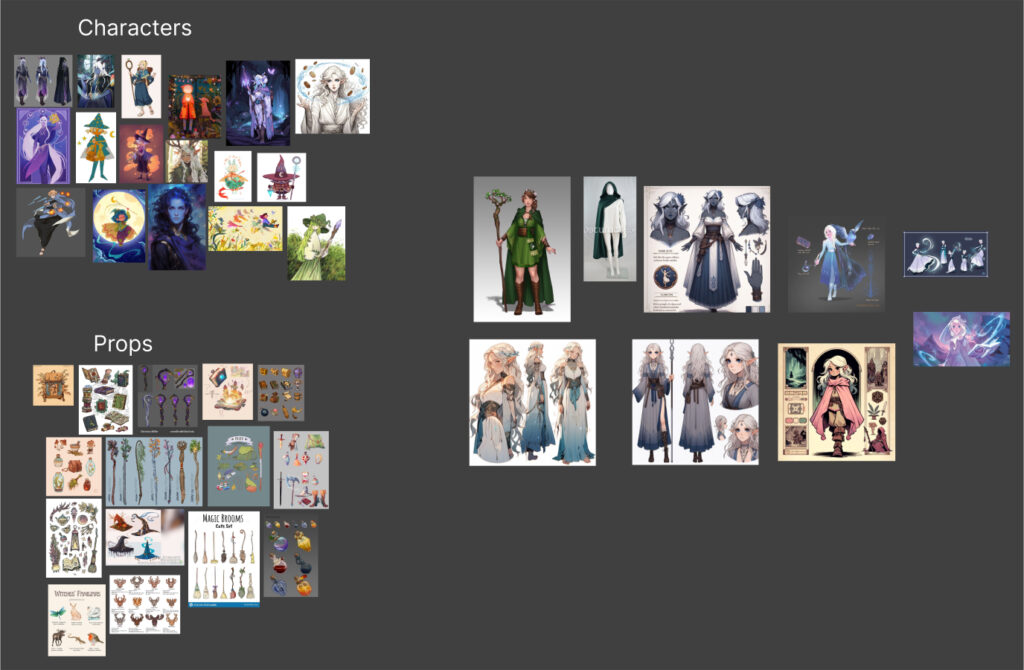
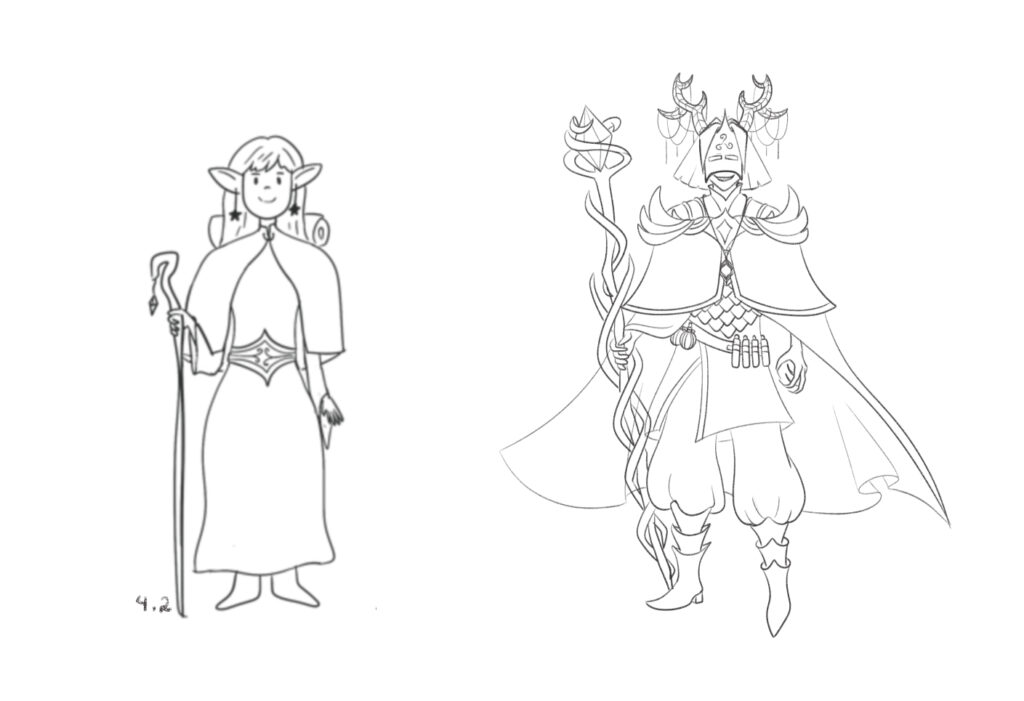
To show you how I work, I’ll use two characters I’ve created as examples: Lyria and Malakar.
For Malakar, I received a detailed character description, including his personality and even the clothes he wore. That made the reference search easier, but it also limited how much I could create.
Lyria, on the other hand, I created entirely from scratch for a card game about witches and wizards. I knew only her class, a sorcerer.
Before searching for visuals, I read the character’s brief, tried to understand who they were, and made a list of what elements needed to be in their design — like I did with Malakar — and also what extra features I wanted to add to tell more about their story.
I started with a moodboard for each character, collecting images of clothes, character poses, accessories, and designs I liked that could spark ideas. This helped a lot once I started sketching.
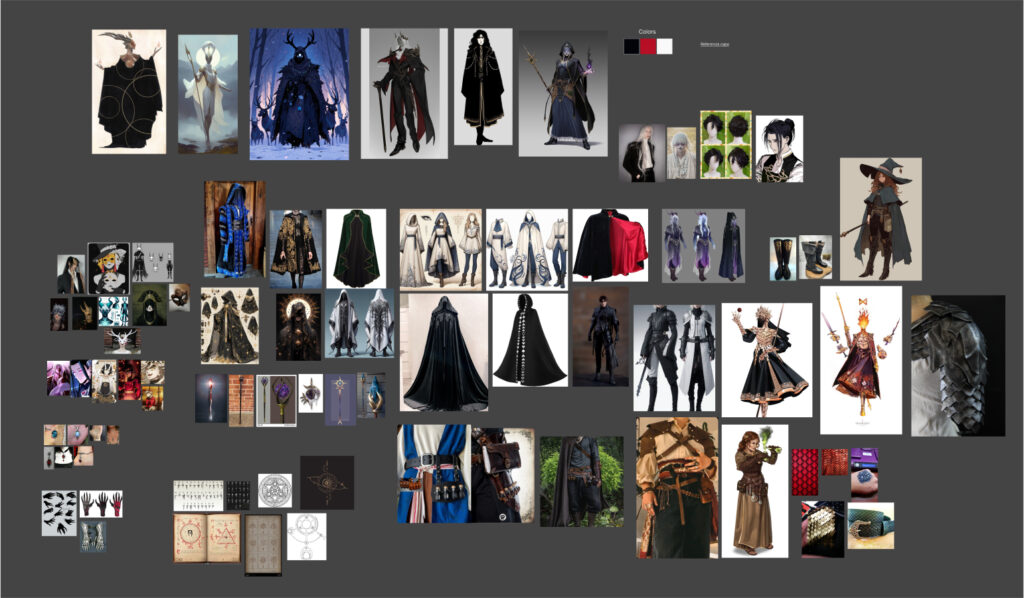
Tip: don’t limit your references to just other characters. Inspiration can come from the most unexpected places. I remember hearing about a character whose helmet was inspired by a jar lid. I wish I could remember which one!
The Basics of Silhouette, Shape Language, and Style
After the moodboard, I move on to sketching silhouettes. This is just one way to begin, not a hard rule, but I used it for both Lyria and Malakar.
Silhouettes help make your character visually clear and recognizable. Color matters too, of course, but silhouette plays a big role in defining a strong visual identity.
In the gaming industry, especially in mobile games, where characters are tiny on screen, silhouettes are key. In children’s books and other markets, opinions vary — but I find it’s a helpful place to start.
Take a look at these characters I designed — you can probably guess if they’re meant to be “good” or “bad” just from their shapes.
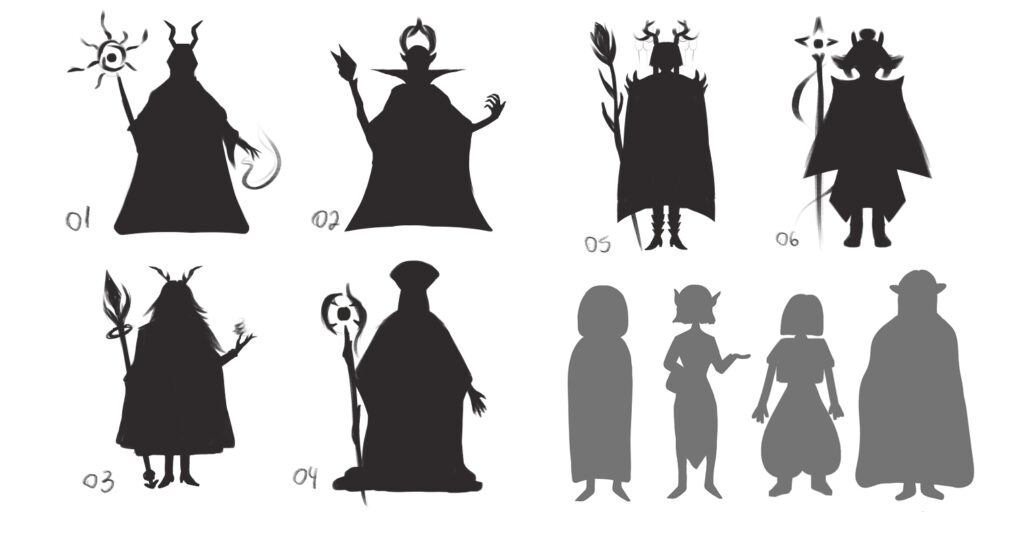
That’s because the shapes in a silhouette say a lot:
- Round shapes: friendly, soft, comforting;
- Square shapes: strong, grounded, rigid;
- Triangles or sharp angles: dangerous, rebellious, threatening.
A great example is in the movie Up.
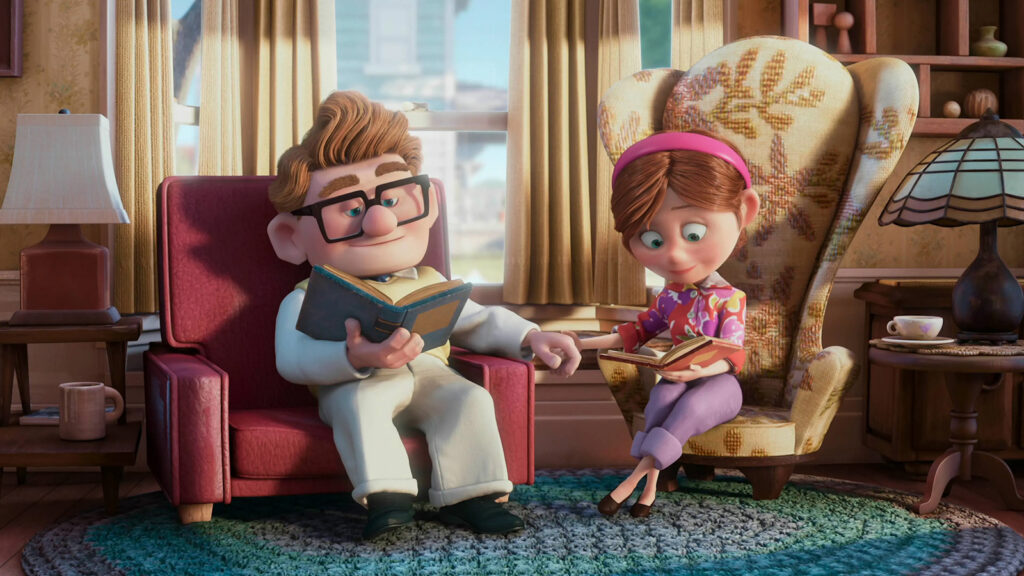
See how the characters’ shapes match their personalities? Even the environment around them follows the same logic. She has a rounder silhouette, and everything on her side of the room has soft curves. He’s made of square shapes, and his side reflects that too.
But then you can ask: “And if a character is friendly and rebellious?” Mix the shapes! Rounded forms with sharp edges can show a more complex personality.
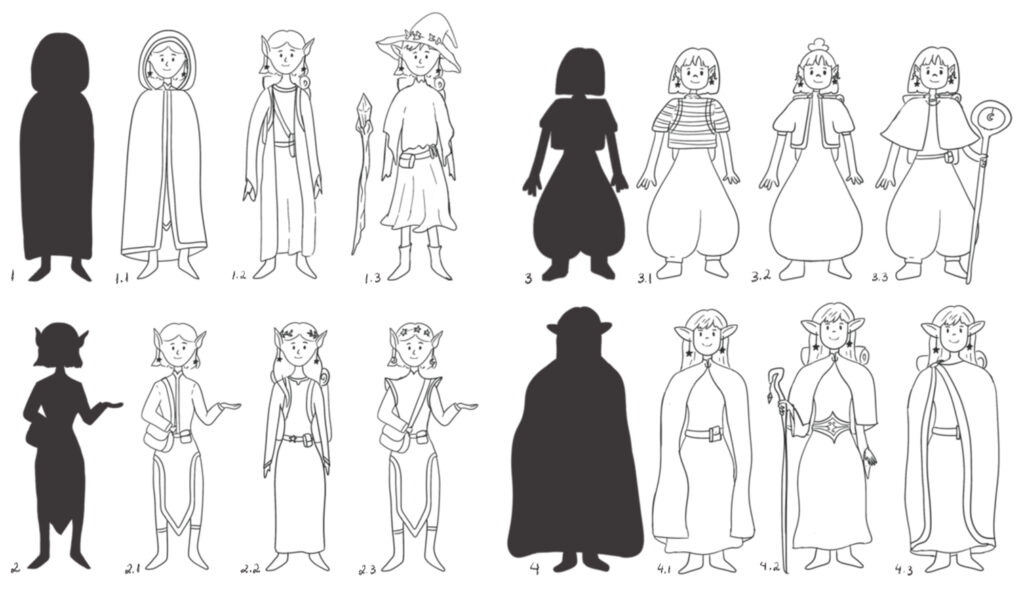
To create my silhouettes, I started with one base silhouette and asked myself questions:
- Who is this character?
- Where does he/she come from?
- What’s his/her personality and weakness?
From there, I changed the silhouette, asking:
- What if she/he wear a cape?
- What if she/he was taller?
- What if she/he has a different head or outfit shape?
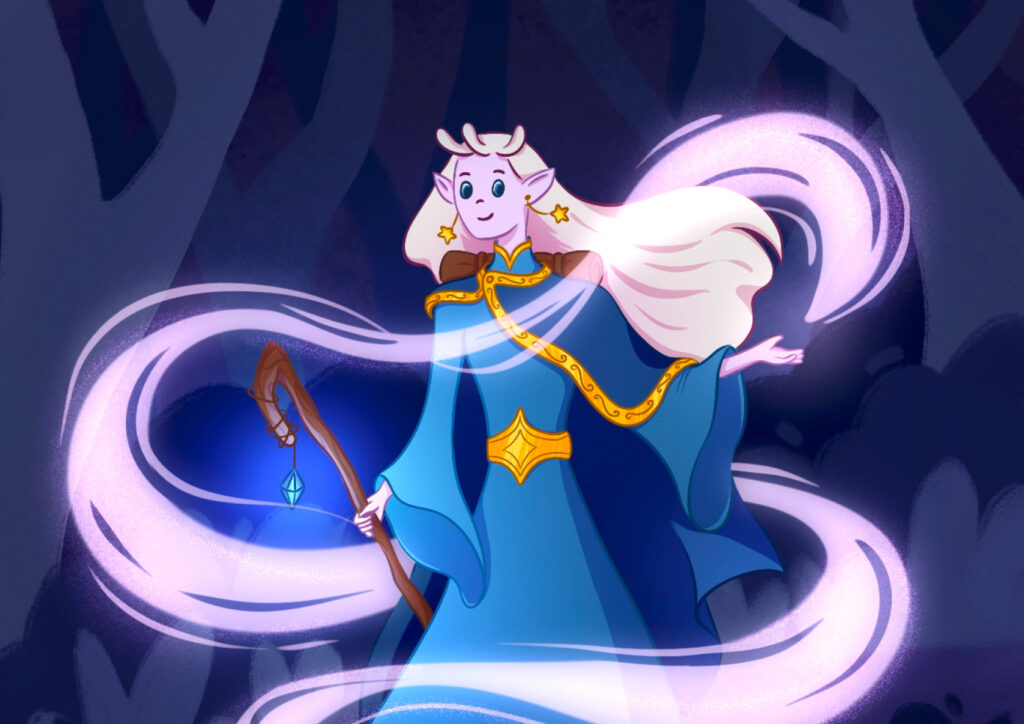
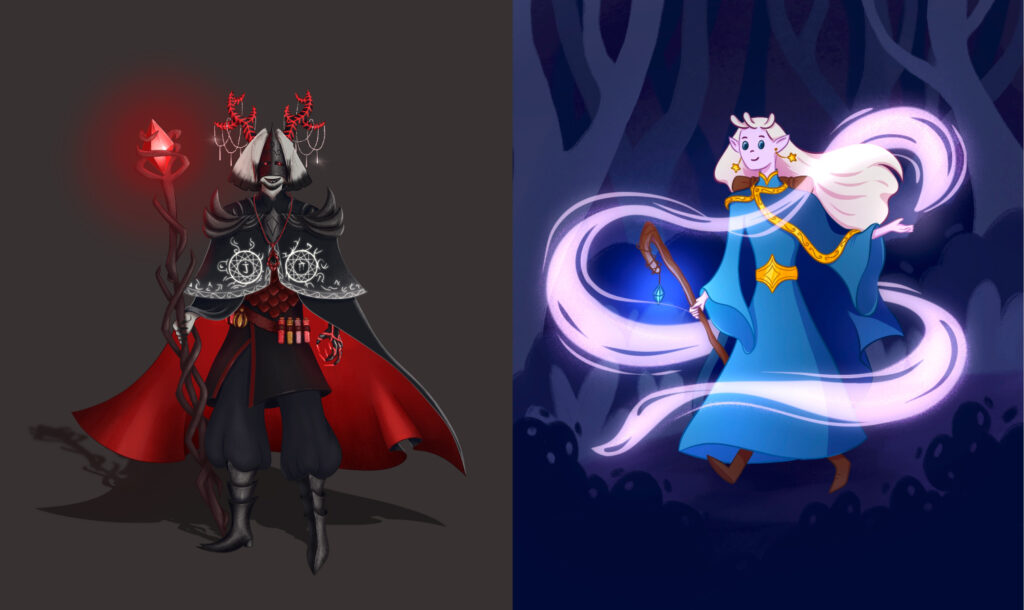
For Lyria (the sorcerer), I used mostly rounded shapes with a few sharp details to show her adventurous side.
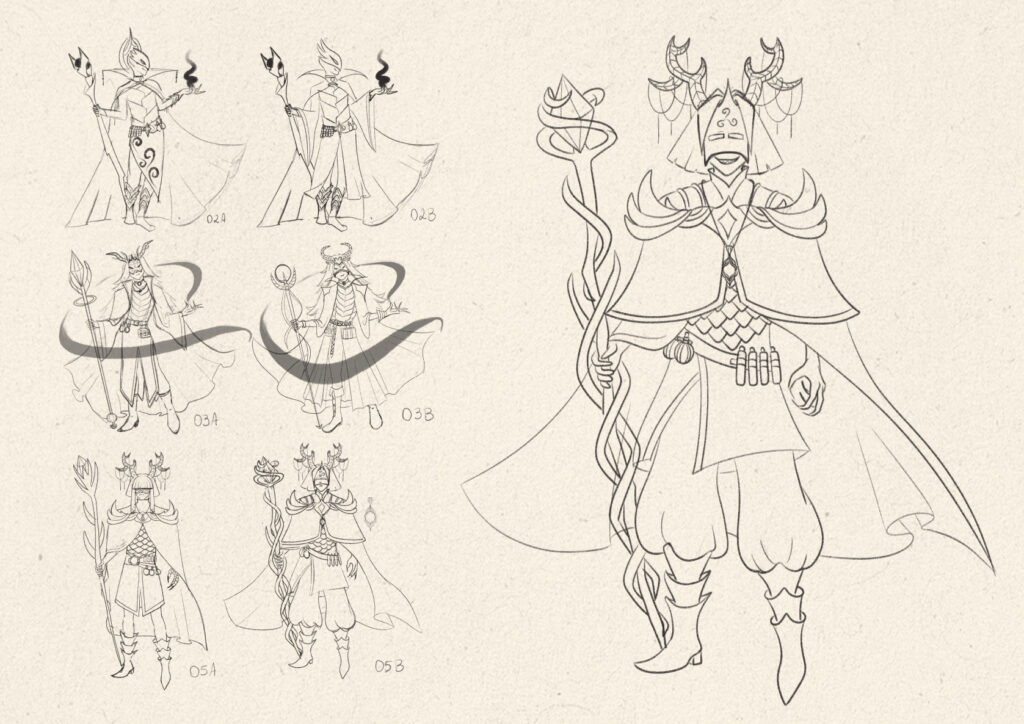
For Malakar (a warlock), I leaned into sharp, pointed shapes to convey his darker nature.
Then it was time to decide which silhouette I would move forward with. For Malakar I got help from my teacher to choose Malakar’s final silhouette — he selected three versions for me to develop further.
Lyria’s silhouette was my decision, so I preferred to move on to the next stage before settling on a final silhouette.
Time to add details through drawing
Once the silhouette is ready, it’s time to add details. I leaned heavily on the moodboard here, looking at accessories, clothing shapes, hairstyle, facial features, body type, and even considering the character’s pose.
For Lyria, I didn’t worry about the pose at first. I focused on accessories. She’s a traveler and explorer, so she needed a bag or a backpack. I thought a staff would be cool, both for walking and casting spells. I gave her a cape or full-body outfit to keep warm, and added accessories like a belt, earrings, and gold details to reflect her elven beauty.
Malakar had a more specific brief: a velvet cloak with arcane symbols, a reinforced dark leather tunic with black metal plates, a dragon-leather belt, and so on. I experimented with how those elements could look, and added my own touches like different haircuts, staff designs, cloak shapes, and boots.

In the end, I chose the Lyria design that best fit her concept, while my teacher picked the version of Malakar that matched his description most closely.
And now I would like to ask you 2 questions: Do you also usually follow this step-by-step that I mentioned today to create your characters? What kinds of questions do you ask to really understand who they are?
Thanks so much for reading!
Charlene ⭐
Read part 2 here: How I create characters: a practical guide for illustrators – Part 02